Transferring photos from your Canon digital camera to a computer is an essential step for editing, organizing, and sharing your high-quality images. Whether you’re a professional photographer or a casual shooter, knowing how to transfer your photos efficiently can save you time and avoid potential data loss. This guide will walk you through four easy and effective ways to transfer your Canon camera photos to your computer, using USB, SD card readers, and wireless methods. We’ll also provide tips on ensuring a smooth transfer process to keep your workflow seamless.

How Do You Transfer Photos Using a USB Cable?
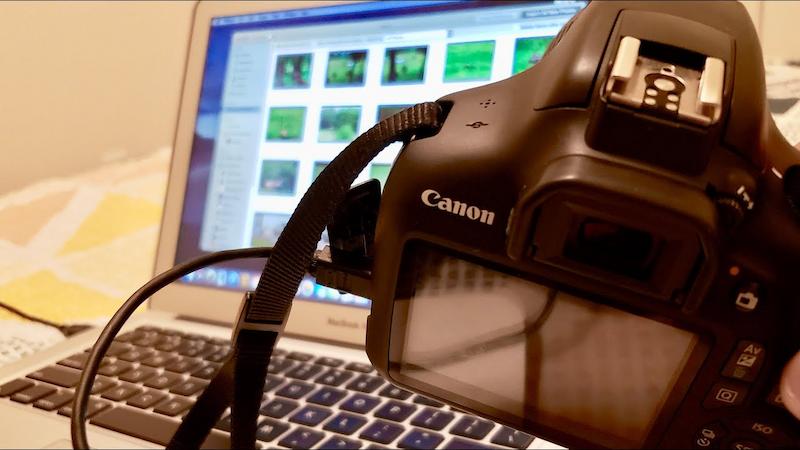
1.One of the most straightforward ways to transfer photos from your Canon camera to your computer is by using a USB cable. This method ensures a direct and secure connection between your camera and your computer, making it ideal for transferring large files without the need for additional accessories.
2.Locate Your USB Cable: Start by finding the USB cable that came with your Canon camera. This cable typically has a mini-USB or micro-USB connector on one end (to connect to the camera) and a standard USB connector on the other end (to connect to the computer).
3.Turn Off the Camera: Before connecting your camera to your computer, make sure the camera is turned off to avoid any potential data corruption or connection issues.
4.Connect the Camera to Your Computer: Plug the small end of the USB cable into your camera’s USB port and the other end into an available USB port on your computer.
5.Turn On the Camera: Once the connection is established, turn on your camera. Your computer should automatically recognize the camera as a connected device.
6.Open File Explorer (Windows) or Finder (Mac): On your computer, navigate to the file explorer or finder, and you should see your Canon camera listed as an external device.
7.Access the Photos Folder: Open the folder where your camera stores photos. This is typically within a folder named “DCIM” on most cameras.
8.Select and Transfer Photos: Browse through the photos and select the ones you wish to transfer. You can drag and drop them to a designated folder on your computer.
9.Safely Disconnect the Camera: After the transfer is complete, safely eject the camera from your computer by using the appropriate method for your operating system. Turn off the camera before unplugging the USB cable.

How Can You Transfer Photos Using an SD Card Reader?
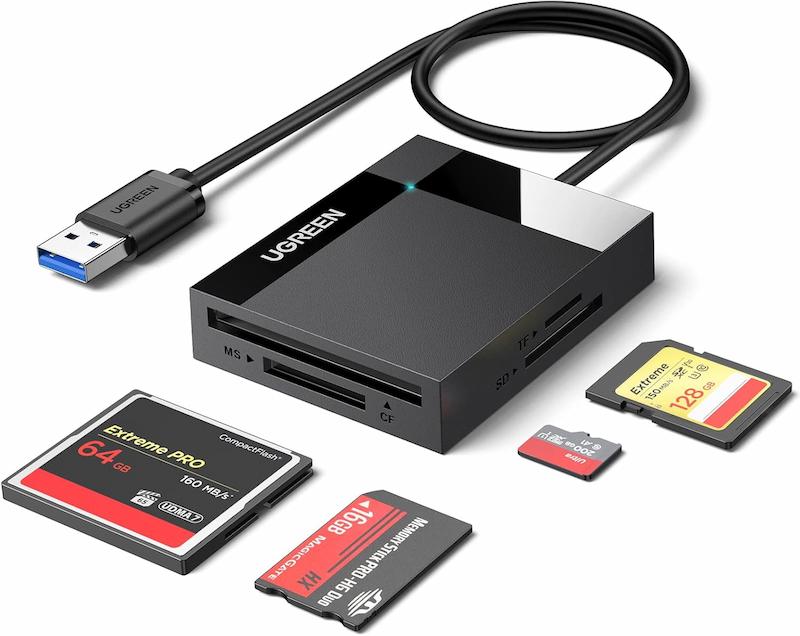
1.If your Canon camera uses an SD card to store photos, another convenient option for transferring files to your computer is by using an SD card reader. This method eliminates the need to connect the camera directly, allowing you to transfer photos simply by using the SD card itself.
2.Remove the SD Card from Your Camera: Begin by turning off your Canon camera and carefully removing the SD card from the memory card slot.
3.Insert the SD Card into an SD Card Reader: Take the SD card and insert it into an SD card reader. Many computers have built-in SD card readers, but if yours doesn’t, you can purchase an external USB card reader.
4.Connect the SD Card Reader to Your Computer: If you’re using an external reader, plug it into an available USB port on your computer. Once connected, your computer should automatically recognize the SD card as an external storage device.
5.Open File Explorer (Windows) or Finder (Mac): Navigate to the file explorer or finder, where you’ll see the SD card listed as a storage device.
6.Locate the Photos Folder: Within the SD card’s directory, find the “DCIM” folder where your camera stores photos.
7.Select and Transfer Photos: Browse through the photos, selecting the ones you want to transfer. Drag and drop them to the desired location on your computer.
8.Safely Eject the SD Card: Once the transfer is complete, make sure to safely eject the SD card from your computer before removing it from the reader.
9.Reinsert the SD Card into Your Camera: After transferring the photos, place the SD card back into your camera, ensuring that it is properly seated in the slot.
How to Transfer Photos Wirelessly from Your Canon Camera
1.Many modern Canon cameras come equipped with built-in Wi-Fi, allowing you to transfer photos wirelessly to your computer without the need for cables or SD card readers. This method is convenient for photographers who want to transfer photos on the go or avoid the hassle of connecting multiple devices.
2.Enable Wi-Fi on Your Canon Camera: First, make sure your Canon camera’s Wi-Fi functionality is enabled. This option can usually be found in the camera’s settings menu under “Wi-Fi settings.”
3.Install Canon’s Wireless Utility Software: Before transferring photos wirelessly, download and install Canon’s wireless utility software (e.g., Canon Camera Connect or EOS Utility) on your computer. This software is essential for establishing a wireless connection between your camera and your computer.
4.Connect to a Wi-Fi Network: On your camera, connect to your local Wi-Fi network. Ensure that your computer is also connected to the same Wi-Fi network.
5.Pair Your Camera with Your Computer: Follow the instructions in the camera’s settings or the wireless utility software to pair your Canon camera with your computer. This step may require scanning for available devices and confirming the connection.
6.Select Photos to Transfer: Once the connection is established, you’ll be able to browse the photos stored on your camera via the software interface on your computer. Select the photos you want to transfer.
7.Initiate the Wireless Transfer: Click the transfer button to begin sending the selected photos from your camera to your computer. The transfer speed will depend on your Wi-Fi connection and the size of the photos.
8.Review and Save Photos on Your Computer: After the transfer is complete, the photos will be saved on your computer. You can then organize or edit them as needed.
9.Disconnect the Camera: Once the transfer is finished, disconnect your Canon camera from the Wi-Fi network, if desired. You can also disable the Wi-Fi function on the camera to conserve battery power.
What Are the Best Practices for Ensuring a Smooth Transfer?
To ensure that your photos transfer from your Canon camera to your computer without issues, here are a few best practices:
Conclusion
Transferring photos from your Canon digital camera to your computer is a vital step in your photography workflow, allowing you to edit, share, and store your images securely. Whether you choose to use a USB cable, SD card reader, or Wi-Fi, each method offers its advantages depending on your preferences and situation. By following the steps outlined in this guide, you can ensure a smooth and efficient transfer process. Remember to always back up your files and keep your devices updated for the best performance.
FAQs
Why won’t my computer recognize my Canon camera?
If your computer won’t recognize your Canon camera, it could be due to a faulty USB cable, incorrect settings on the camera, outdated drivers on your computer, or the camera not being in the correct mode (e.g., “Play” or “Transfer” mode). Check connections and settings carefully.
Can I transfer RAW files from my Canon camera to my computer?
Yes, you can transfer RAW files from your Canon camera to your computer using any of the methods mentioned above. However, RAW files are much larger than JPEGs, so transferring via USB or SD card is typically faster than using Wi-Fi. Ensure that your computer has software capable of handling RAW files, such as Adobe Lightroom or Canon’s Digital Photo Professional.
How do I transfer photos from my Canon camera to my computer wirelessly?
To transfer photos wirelessly from your Canon camera to your computer, first, enable Wi-Fi on your camera by accessing the Wi-Fi settings in the menu. Next, install the appropriate Canon software, such as Canon EOS Utility or Camera Connect, on your computer. Ensure both your camera and computer are connected to the same Wi-Fi network. Then, pair your camera with your computer through the software. Once connected, select and transfer the desired photos wirelessly through the software’s interface.
