Ever felt the frustration of weak Wi-Fi signals or a sluggish internet connection at home? It’s a problem most of us have faced, and the solution often lies in the simple task of properly connecting your router to your modem. Knowing how to connect a router to a modem is not just a techie’s skill—it’s essential knowledge for anyone wanting to enjoy smooth streaming, gaming, or working from home. In this guide, I’ll walk you through the entire process step-by-step, ensuring that by the end, you’re not just connected, but cruising on a fast and secure internet highway.

What You Need Before You Start
Before diving into the actual setup, let’s make sure you’ve got everything you need. Here’s a quick checklist:
√ Modem: This device connects to your internet service provider (ISP) and brings the internet into your home.
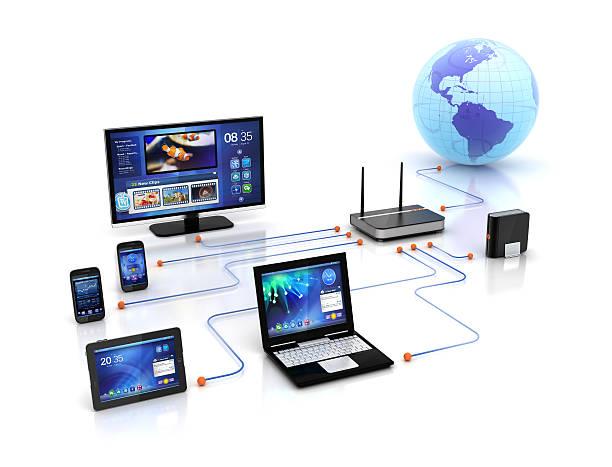
√ Router: A router takes that internet connection from the modem and distributes it wirelessly or through Ethernet cables to your devices.
√ Ethernet Cables: These are used to connect the modem to the router and can also be used to connect devices directly to the router for a wired connection.
Having these items ready will make the setup process smoother and quicker, saving you from unnecessary delays.
Step-by-Step Instructions
Follow these detailed steps to connect and configure your modem and router, ensuring all your devices are ready to go online.
Step 1: Setup Your Modem
First things first, we need to get your modem up and running.
– Connect the Modem to the Cable Outlet: Locate the coaxial cable that comes from your ISP (usually through the wall) and connect it to the port labeled “Cable” on the back of your modem. Ensure it’s securely fastened to avoid any connection issues.
– Powering the Modem: Plug your modem into a power outlet using the provided power cable. Most modems have an indicator light that shows the device is receiving power. Wait a minute or two for the modem to boot up and establish a connection with your ISP. The lights on your modem should stop blinking and remain steady, indicating that it’s ready to move on to the next step.
– Verify Connection Status: Typically, modems have multiple lights that indicate the status of your connection. Ensure that the “Online” or “Internet” light is steady, which means the modem is connected to the internet. If it’s not, you may need to contact your ISP for assistance.
Step 2: Connect Your Router to the Modem
Now that your modem is set up, it’s time to connect your router.
– Use an Ethernet Cable to Connect the Router’s WAN Port to the Modem: Grab an Ethernet cable and connect one end to the modem’s Ethernet port (sometimes labeled as “LAN” or “Ethernet”) and the other end to the router’s WAN port. The WAN port is usually distinguishable by its different color or label, often marked as “Internet” or “WAN.”
– Powering on the Router: Plug your router into a power source. Once it’s powered on, give it a couple of minutes to fully boot up. Most routers have indicator lights as well, and you’ll want to see the “Internet” light come on, indicating that the connection between the modem and router is established.
Step 3: Configure Your Router
With the physical connections out of the way, let’s jump into the router’s settings to personalize your network.
– Accessing the Router’s Admin Panel: Open a web browser on a device connected to the router. In the address bar, type the router’s IP address—usually something like `192.168.1.1` or `192.168.0.1`. This address is often printed on the router or included in the user manual. Press Enter, and you’ll be prompted to enter a username and password. By default, these are often “admin” and “password” or some variation thereof, but check your router’s documentation for the specifics.
– Setting up Wi-Fi Network Names (SSID) and Password: Once inside the admin panel, navigate to the wireless settings section. Here, you can change the SSID (the name of your Wi-Fi network) to something unique and easy to recognize. It’s a good practice to choose a strong password to secure your network—avoid common phrases or easily guessable words.
Step 4: Connect Devices to Your Network
Now that your router is configured, it’s time to start connecting your devices.
– Connecting Devices Wirelessly or via Ethernet: For wireless connections, search for the Wi-Fi network you just set up on your device. Select the network and enter your newly created password. For wired connections, simply plug an Ethernet cable into one of the router’s LAN ports and connect the other end to your device.
– Verifying Internet Access on Connected Devices: Once your device is connected to the network, open a web browser and try accessing a website. If it loads successfully, congratulations! You’re now connected to the internet.

Troubleshooting Common Issues
Even with the best instructions, things don’t always go as planned. Let’s tackle a few common issues you might encounter:
– No Internet Connection: If your devices aren’t connecting to the internet, first check the lights on your modem and router. Ensure the “Internet” or “Online” lights are steady. If not, try restarting both the modem and router by unplugging them, waiting 30 seconds, and plugging them back in.
– Wi-Fi Network Not Appearing: If your Wi-Fi network isn’t showing up on your devices, double-check that the wireless settings in the router’s admin panel are correctly configured. Make sure the SSID broadcast is enabled and that you’re looking for the correct network name.
– Slow Internet Speeds: If your connection is slow, consider relocating your router to a more central location in your home, away from thick walls or electronic devices that could cause interference. You can also try switching your router’s channel in the admin panel to a less congested one.
Advantages of Using a Router and Modem Setup
Why go through the trouble of setting up a router and modem when you could just rely on the equipment provided by your ISP? Here are some compelling reasons:
– Extended Network Range: A separate router typically offers a stronger and more far-reaching Wi-Fi signal compared to an all-in-one modem/router unit, especially if you choose a high-quality router.
– Enhanced Security: A dedicated router allows you to implement more robust security settings, such as WPA3 encryption, guest networks, and firewall configurations. This ensures your home network is safe from intruders.
– Support for Multiple Devices: Modern routers are designed to handle multiple devices without compromising speed. Whether you’re streaming 4K videos, gaming online, or hosting a Zoom meeting, a good router can manage it all seamlessly.
Conclusion
Learning how to connect a router to a modem isn’t just about getting online—it’s about unlocking the full potential of your internet connection. From setup to troubleshooting, this guide has covered every step you need to create a fast, secure, and reliable home network. So, go ahead, follow these steps, and enjoy the uninterrupted online experience that you deserve!
FAQs
Can I Use Any Router With My Modem?
The short answer is, yes—most routers are compatible with most modems. However, it’s important to ensure that the router supports the type of connection your modem provides (e.g., DSL, cable, fiber). Additionally, if you have a modem/router combo from your ISP, you’ll need to disable the router function in the combo device to avoid conflicts.
What Do I Do if My Internet Connection Is Slow After Setup?
Slow internet can be a bummer, especially after you’ve gone through the trouble of setting everything up. Try optimizing your router’s placement—central locations are best, and avoid areas with thick walls or metal objects. Also, check the router settings in the admin panel and ensure your router is on the least crowded channel. You might also want to consider upgrading your internet plan if you have multiple users or devices.
How Do I Change My Router’s Settings?
Changing your router’s settings is as simple as accessing the admin panel via your web browser. Just type in the router’s IP address, log in with your credentials, and you’re in. From there, you can tweak everything from Wi-Fi passwords to security settings and even parental controls.
Is It Better to Buy or Rent a Modem and Router From My ISP?
This depends on your needs and preferences. Renting from your ISP offers convenience, as they usually handle maintenance and troubleshooting. However, buying your own modem and router can save you money in the long run, especially since rental fees can add up. Moreover, purchasing your own devices often means better performance, more features, and the freedom to choose equipment that suits your specific needs.
